Wednesday, November 24, 2010

Pumpkin cheesecake Recipe and a coupon!

This is a recipe I adapted from allrecipes.com. It is super yummy. I'll be running a sale from Black Friday to Cyber Monday. For 15% off your order, please use the code: PUMPKINBLOG
Happy Thanksgiving!

Ingredients

  • 2 (8 ounce) packages cream cheese, softened - I used Philadelphia Cream Cheese 1/3 Less Fat
  • 1/2 cup white sugar
  • 1/2 teaspoon vanilla extract
  • 2 eggs
  • 1/2 c sour cream - I used a light one
  • 1 (9 inch) prepared graham cracker crust
  • 1/2 cup pumpkin pie filling
  • 1/2 teaspoon ground cinnamon
  • 1 pinch ground cloves
  • 1 pinch ground nutmeg
  • 1/2 cup frozen whipped topping, thawed

Directions

  1. Preheat oven to 350 degrees F (about 146 degrees C)
  2. In a large bowl, beat cream cheese. Add sugar and vanilla and beat until smooth. Blend in eggs one at a time. Fold in the sour cream. Remove 1 cup of batter and spread into bottom of crust; set aside.
  3. Add pumpkin, cinnamon, cloves and nutmeg to the remaining batter and stir gently until well blended. Carefully spread over the batter in the crust.
  4. Bake in preheated oven in a water bath* for 60 minutes, or until center is almost set. Allow to sit in the turned off oven with the door open for another hour, then refrigerate for 3 hours or overnight. Cover with whipped topping before serving.
* A water bath is just a pan of water placed into an oven. The hot water provides a constant, steady heat source and ensures even, slow cooking for recipes that call for a water bath.

The best type of pan to use for a water bath is a roasting pan or other pan with sides at least 1-1/2 to 2 inches high. That will allow you to put enough water into the pan so it won't all evaporate before your pudding or cheesecake has baked.

Put your pudding or cheesecake into the roasting pan, place the pan into the oven, and add enough hot water to reach halfway up the pan.

Thursday, October 14, 2010

change is good

Today I decided to discontinue a few made to order pieces. I never want to end up hating a design I've come up with and it was fast approaching that point with my beloved spiders and my kalimba collection. Maybe if the mood strikes I'll make some more but if I don't love it anymore, it won't get made with good vibes. And that's not how I roll, so I bid a fond farewell to my spiders and my kalimba pieces!


Monday, October 11, 2010

it's been a long time!

I shouldn't have left you without a dope beat to step to. step to. step to....

To make up for it, here are some photos of new work
and just for kicks (ha!) one of Young Master.

fancy initial medallion


tie tack Mr. Beads was gracious enough to model


cufflinks


Initial ring that hasn't left my finger since creation!!!!


Kia! That's what Young Master says with this kick

Monday, August 23, 2010

Silhouette - Digital Cutting Machine Giveaway

OK. I just saw the coolest thing and I WANT it. Like For Real, FOR REAL!!!! It's a vinyl cutting machine and it MUST be mine!!!

I'm trying to win it here and you can try too:

http://www.bystephanielynn.com/2010/08/over-300-giveaway-santa-has-arrived.html

What would you make with it if you won? There are sooooo many endless possibilities and you all know how I LOVE possibilities!!!!

Good Luck to you and me!

In jewelry news, I couldn't help myself. I got these AMAZING beads that I'm not quite sure what I'm doing with yet. Several have already been spoken for by family members that saw them Saturday at a birthday party. lol. My mother-in-law doesn't even want me to make anything with the one she bought. She said she felt a connection to it and had to have it. They are THAT HOT!

I also made a new initial piece I'm thinking of putting in the shop. More on that later.

Thursday, July 22, 2010

Personality!

So when Young Master was about 3 months old I bought this great book (for 50 cents!) at a library book sale called "Nurture by Nature." Basically it is a personality type assessment (utilizing Myers-Briggs) book that deals with children and puts forth the premise that one-size parenting does not fit all because all children are different. Too true as my sisters and I are not carbon copies of one another by any stretch and what worked for one, invariably did not work for another.

Anyway, the book is to help you figure out what personality best describes your child or children and offers some insight into how their minds work and how to best work with them. It also gives insight into your personality and how it affects your interactions with your child. Young Master has not really been old enough to assess on all points of the scale until this year and even then it's a bit of guesswork. But first let's talk about my personality and then relate it to his.

The books say that I am an ESFP. One aspect of that personality type that I OWN is that ESFPs love spontaneity and being impulsive. I don't like being tied down to a schedule and I start to feel caged in with too many appointments and dates on my calendar. Even if it's mostly fun things on the calendar! I got married at the justice of the peace in part because the thought of having to plan a wedding gave me anxiety attacks.


Turns out the boy is an ESTJ ie. he loves structure and a well laid out plan. Oops! As you can imagine, this can be a problem. He wakes up in the morning wanting to know the plan for the day and I really try to have one all laid out
(OK. I don't really try to. It just so happens sometimes I have a plan). It's much easier for me during the school year because half the day is planned out anyway. If there is no plan laid out, he will try to make one. lol.

Well, I love my son more than I love spontaneity so I'm trying to work it out. The book suggested something he might enjoy as an ESTJ is cooking. I'd noticed in the past when we cooked, he'd enjoyed it but the book took it to another level. It was saying that ESTJ children enjoy it because when you have a recipe, you are following a plan and introducing structure! Well that I can get on board with no problem in the cooking realm.


Why is that you ask? A little history for you. My mom never taught us to cook because she didn't want us to end up being in her words "some man's cook!" I appreciate her sentiment but it didn't really hold me in good stead in college when I couldn't even make ramen noodles.
All my life I grew up with the mentality of not being "some man's cook" so like any logical person would do, I made it one of my goals in life as a youngster to marry a chef so I'd never have to cook. That didn't quite work out. lol. So one of my goals now is to make sure my son knows how to cook so he won't be dependent on "some woman to do it for him!" <--- my words that he can quote when he's grown.

The other day I was at TJ Maxx and found the cutest little cooking set with kid-sized utensils, a small apron and a small laminated recipe book (to account for spills!). It's from the Playful Chef (
http://playfulinc.com). So you know it was on! So far from the cookbook we've made:


Honey Yogurt Dip
Fruit Smoothies
Pancakes
Sugar Cookies

We've yet to tackle the chicken nuggets or pita pizza but
I've planned ahead and already purchased the ingredients for the nuggets. Pow! We've also made some other recipes not in the book.

The great thing about this is we are enjoying one another's company and have something to show for it at the end. Also, he is getting to work within his personality's comfort zone and I'm working to better accommodate my child and therefore growing. All in all I'd say that's delicious!


Young Master helping me with dinner. He's not mad, he's concentrating!:

How I'm spending my summer vacation

You all may have noticed I'm even more absent than usual. It's summer vacay for Young Master Beads and someone didn't think to sign him up for camp (not even one week! I tend to be impulsive. More on that later - see next post.) So I have been mom and camp counselor in one. Guess who won't be making the same mistake next year. It is a bit draining to keep up with this very active four year old particularly when it's so hot outside. There have only been like 3 days under 90 degrees all summer. Mama Beads doesn't do heat.

Here are a few photos of what we've been up to:

Children's museum in Raleigh, NC

Using mommy's tools to make a sword as he rides his mount (ie. bopper)

Children's museum in Baltimore, MD

Nature walk in local park. We saw deer and a chipmunk!

Fun with mustache crayons we got from Auntie Andrea

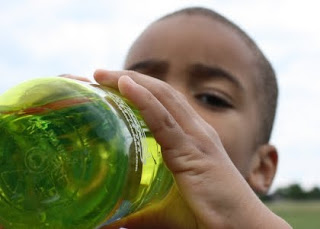
Drinking water to beat the heat

Oh and lest I forget, we also experienced an earthquake! Look at the damage it did!

picture was received in a forward about the massive destruction to our area. ;D

Hope you all are having a great summer!

xo,
Nina

Tuesday, June 8, 2010

Diffused light is your friend and can be done inexpensively!

Ohhh Emmm Geee!

Has it really been THAT long since I've written. Actually let me stop playing. I know it's been that long and I have definitely thought about my blog at least twice a week since April. Mostly feeling guilty that I haven't updated it. I'm sorry guys. Busy Busy Busy AND not much of a blog writer. I find the best blogs are written by those who have an actual passion for writing. I just kind of goof around with it but all my favorite reads are people who excel at the craft and love it. So I give what I have and it ain't much. lol. Thanks for sticking with me.

Since I've been gone so long I just wanted to show you a photo I took today that shows the importance of lighting. For my husband's friend's wedding I decided to make a little charm to hang from the bridal bouquet as a keepsake for the couple. And I wanted to try out gold-filled metal and this gave me the perfect excuse to purchase some as their wedding colors apparently involve warm colors.


The picture on the left was taken in front of a window without anything to diffuse the light and make it softer. The picture on the left utilizes diffused light. Big difference right?!??!?! I could explain what diffusing the light does but I think the picture does a waaaay better job than I could do typing it out.

Now you're wondering, Nina, how did you do that?!!? I wiggled my nose of course and *poof!* great shot! Just kidding. You can diffuse light in different ways. The way I used here was to just stick it in a professional light box.

Right photo courtesy of ezcube.com
This was the first time I'd used mine (as evidenced by my not knowing how to keep it from collapsing without the use of a pencil sharpener). The fabric that is used for the box acts a natural light filter. Before I got all *fancy* and got a light box, (ie. my big sister bought one and decided she didn't want it anymore. It's how I get a lot of things. hee hee) I used other means to diffuse the light. Here are two other things you can use!

1. I used to have a handmade light box made from cardboard (it was the saddest looking thing you guys. Really. But it worked really well!) and I used Fusible Interfacing. What is that? Something used in sewing to make fabric stiffer. You can get it really cheaply at the fabric store and at Michael's. It's like $2.00 for a yard. And cardboard boxes are all over the place for free.

Photo courtesy of Amazon.com

I happened to have both on hand at the time. Here is a great tutorial on how to make your own lightbox and it's how I made my first one: http://strobist.blogspot.com/2006/07/how-to-diy-10-macro-photo-studio.html


2. Those cheapo light filtering shades available at Home Depot and other places. They are awesome because you can just set small items in front of them and you're done! No need to construct a light box! We upgraded our window treatments so this option is no longer available. *tear* It's my favorite option as it involves the least amount of set up.

Photo courtesy of JustBlinds.com

So there you have it! Three options for diffusing light. And one day I will learn how to use my fancy light box correctly. But until then, I hope someone out there who does small object photography finds this useful!

xo,
Nina